6 things to consider before shooting testimonial videos.
One of the easiest kinds of videos that you can make, and also one of the most effective, is a testimonial video. Testimonials are easy because you’re not on camera – you’re not going to be in the video.
It’s going to be you shooting a video of someone else – which is really easy. It’s a whole lot easier than get actually getting in front of the lens yourself.
One thing you can do is whenever you’re working with a client, like when you’ve just finished a really successful session with someone, that’s a really good time to just take a moment and say, “Hey, would you mind if we did a testimonial video right now?”
And in that moment, when they’re feeling they just got some really great result, it’s a really good time for them to tell their story. A good testimonial is probably the most powerful thing that you can do with video because you’re not telling the story, someone else is telling the story.
You can make videos that talk about yourself and the work you do and the results people get when they work with you, but it’s not nearly as effective as when someone else does that for you.
This is the real reason why you want to be thinking about making testimonial videos.
1. The Camera
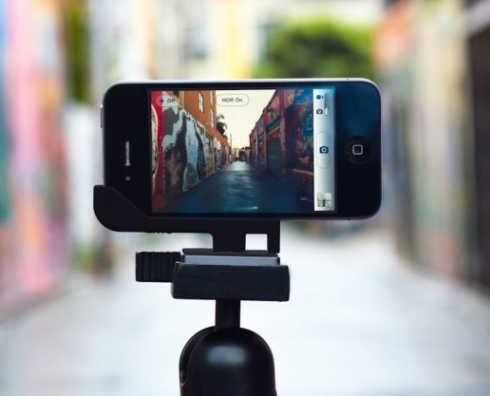
Using your phone is fine. Just be sure that when you’re shooting your video testimonials you turn the phone so that it’s horizontal (see image on right). All the places where your video will be seen are widescreen – so you need to shoot widescreen.
Pro tip: if you’re using an iphone or ipad and you’d like a little more control over focus and exposure, then download the FilmicPro app which allows you to adjust settings manually.
Keep the camera steady while you’re shooting. The best tool for this is a tripod – like this one that has a universal phone mount (and costs only $6.99).
But if you don’t have a tripod you can steady the camera by holding it with both hands and then bringing your elbows into your chest for support.
2. Location
Choose a quiet space with lots of natural light that has a non-distracting background. Shooting outdoors is possible but you’ll need to shoot your subject in the shade (not direct sunlight).
Here’s an example (at left) of a hand-held video shot outdoors in natural light. In this case the location was a sheltered garden next to a public library (quiet) and the time of day was early evening which provided a soft golden light.
Shooting indoors will usually give you more control over light. Pick a quiet room. Turn off any noisemaking equipment – like your refrigerator, heater, fan or air conditioner.
Position your subject facing a window so that the light hits their face evenly. And don’t place them right against the wall. They should be at least three feet away from any background – the more separation between them and the background the better.
3. Sound
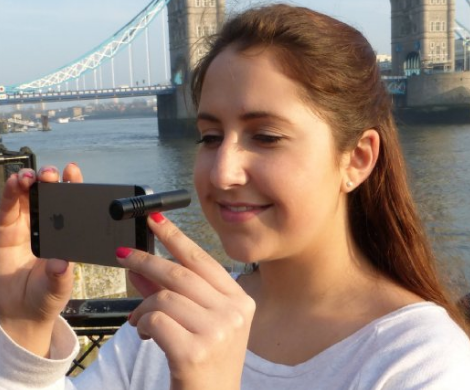
The best way to record good audio is with an external microphone. If you want to turn your iphone into a great audio recording device (which will work for lectures & concerts as well as video interviews) then the Ampridge MightyMic S iPhone Shotgun Video Microphone MMS (at right) is a good choice ($49.00).
It just plugs into the top of your iphone or ipad and you’re ready to record. You can shoot without an external mike but be sure that your subject is speaking with their best stage voice (loud enough). Important: Avoid empty indoor spaces with a lot of echo.
Be sure to get close to your subject when shooting. Having your microphone as close to your subject as possible will give you the best audio quality. The closer you are, the better. Your viewers will be able to see your subject’s eyes and their facial expressions – which will make your video more personable. So, get close. It’s OK to cut off the top of their head.
4. Creative
In the world of filmmaking there’s such a thing as B-roll, which is footage of your subject doing stuff that they normally do. If you want to create a truely beautiful video, then in addition to shooting your subject answering questions in your interview, take some time to shoot them doing other things that are a part of their life or work.
The video (at left) is an excellent example of a style of video testimonials that are shown entirely with B-roll footage while the subject is talking. Notice the extreme closeups on the subject’s eyes and the closeup details of the subject’s hands or the back of his head. With all this visual detail we really feel like we’re getting to know this person.
5. The Interview
The basic story structure for that all video testimonials want to have is a “before” and an “after with a “hero’s” journey of transformation.
Simple, right?
The most important thing to do is to get your subject comfortable with talking to you in front of the camera. You want them to speak in a conversational way using their own voice.
You don’t really want their whole life story, but to help get them warmed up you can start by asking, “How did you get involved in whatever-it-is-that-they-do?”
When they start talking be an active listener by smiling and nodding with what they’re saying.
Important: don’t respond verbally with “Um hmm” or “Uh huh” because that will wreck your audio. Don’t talk until it’s time to ask another question.
You can start your interview by prodding them along with their personal story until you feel like they’re acting and speaking naturally.
Then ask your real interview questions.
Video testimonials can increase your traffic: The homepage placement of the video below increased the site’s traffic from 500 to 5,000 visitors per month!
1. “Tell me what your situation was like before you did-the-thing-you’re-talking-about.”
In the story line, this is the start of the hero’s journey and what want is your subject to reveal a challenge or difficulty that they were facing in their ‘before.’
2. “What made you decide to do-the-thing-you’re-talking-about?”
The best thing here would be for your subject to speak about their desire or motivation or passion.
3. “What were you thinking/feeling when you first started to do-the-thing-you’re-talking-about?”
Here you’re looking for some healthy skepticism and misgivings or doubts.
4. “Was there a moment when you realized that the-thing-you’re-talking-about was giving you an outcome or desire or benefit that you were looking for?”
Hopefully there will be one or two good anecdotes. It’s OK to ask this question twice.
5. “What changes are you seeing now that you’ve been doing the-thing-you’re-talking-about?”
This is likely to be the transformation part of the story. And it can come in the form of a short story of a recent experience.
6. “Is there anything you’d like to say to anyone who is considering doing the-thing-you’re-talking-about?”
This is a great last question that often will elicit something heartfelt.
6. Shooting Tips
When they finish talking press stop.
Recording just one question at a time will help in the editing process making it easier to sort through your footage.
Don’t go on too long. Remember that the final video will only be 2-3 minutes, so getting 15 minutes of footage is plenty!!
When your subject goofs up. (and they will!) Don’t worry. Just stop recording and then start with the question you’re on again. (another good reason for recording one question at a time).
Remember, there are no mistakes. All glitches will be edited out.
So, have fun!


